学习了 flask 为什么还需要 FastAPI ?
flask 只是一个 libary, 还算不上 framework, 虽然小巧精悍, 但是很多功能全靠开发者自己实现或者找第三方库, 可以说虽然组合灵活, 但是终究功能有限, 而且是不支持异步的, 但也正因如此, 没有太多复杂的概念, 才非常适合新手入门
FastAPI
基于 Starlette 和 Pydantic, 利用异步(asynchronous)编程, 提供出色的性能, 同时也集成了更多功能, 如: Pydantic SQLModel Swagger 等, 总之功能比flask更丰富, 且支持异步速度更快
🚀快速开始
- 安装:
uv add fastapi fastapi-cli
安装 fastapi-cli 是为了方便启动开发服务器, 自动重启, 不用在安装 watchdog 这个包了
使用fastapi命令测试: uv run fastapi --help
from fastapi import FastAPI


app = FastAPI()


@app.get("/")
async def index():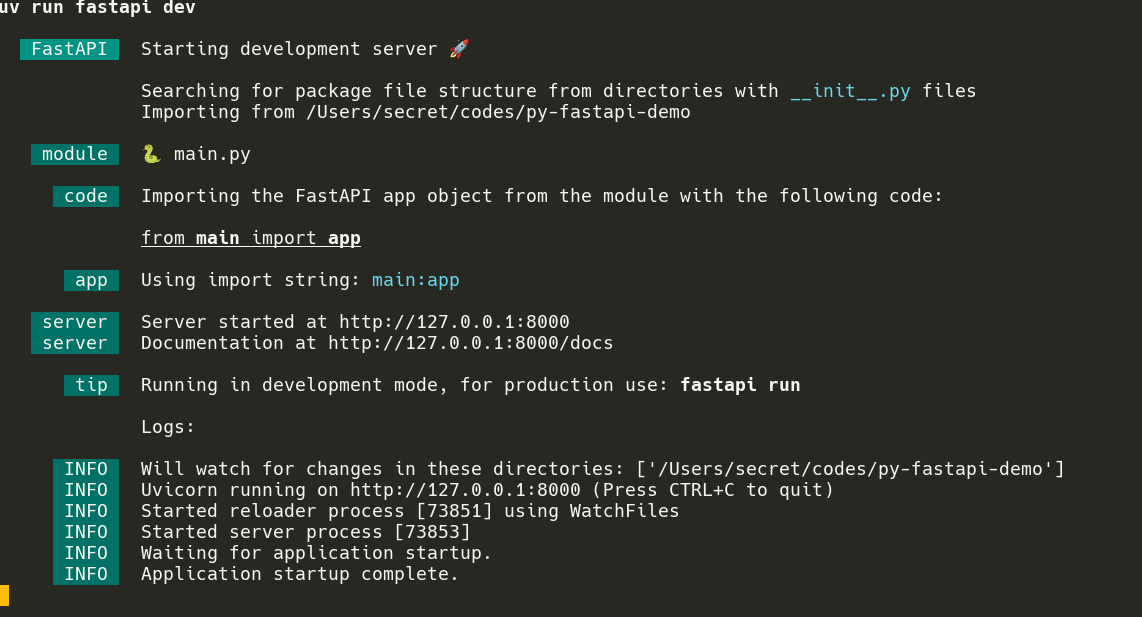
return {"message": "Hello World"}⛵ 扬帆起航: uv run fastapi dev
没看错, 连
main函数都不需要了,fastapi run 这个命令会自动导入这个 main.py 中的 app 变量
服务默认启动在 8000 端口, /docs 是自动生成的 Swagger 接口文档, /redoc 是自动生成的 redoc 文档
请求
Request 对象
from fastapi import FastAPI, Request

app = FastAPI()


@app.get("/")
async def main(request: Request):
    # 查看所有属性
    # print(dir(request))

    method = request.method
    path = request.url.path

    # 不推荐这样获得参数, 不会进行验证
    uid = request.cookies.get("uid")
    page = request.query_params.get("page")
    return {
        "method": method,
        "url": path,
        "cookie": uid,
        "page": page,
}路径参数
- 也叫路由参数
from fastapi import FastAPI, Path


app = FastAPI()


# 设置 path 参数并且制动能转换数据类型
@app.get("/items/{item_id}")
async def item_detail(item_id: int):
    type_str = type(item_id).__name__

    # 响应: {"item_id":100,"type":"int"}
    return {"item_id": item_id, "type": type_str}


# 设置 path 参数, 并限制范围: Path(这里的参数就是 pydantic Field 的参数)
# 这里的 ge 和 le 参数是为了限制 book_id 的范围: 1-100
# 设置 description 参数是为了让 Swagger 接口文档中显示描述
@app.get("/books/{book_id}")
async def book_detail(book_id: int = Path(..., ge=1, le=100, description="书本 id")):
    type_str = type(book_id).__name__

    # curl http://localhost:8000/books/11
    # 响应: {"item_id":11,"type":"int"}

    # curl http://localhost:8000/books/111
    # 响应信息如下, 说明自动验证了参数的范围
    # {
    # "detail": [
    #     {
    #     "type": "less_than_equal",
    #     "loc": [
    #         "path",
    #         "book_id"
    #     ],
    #     "msg": "Input should be less than or equal to 100",
    #     "input": "111",
    #     "ctx": {
    #         "le": 100
    #     }
    #     }
    # ]
    # }
return {"item_id": book_id, "type": type_str}query 参数
from fastapi import FastAPI, Query


app = FastAPI()


# query参数, 直接定义形参即可, 默认情况下是必填的:
# 同样的可以限制参数的类型和取值范围, 只不过要用 Query 这个类
# 而且它的参数和Path一样, 都是 pydantic Feature
@app.get("/items")
async def items(page: int = Query(..., ge=1), limit: int = Query(ge=10, le=100)):
    # curl http://localhost:8000/items?page=1&limit=20
    # 响应: { page: 1, limit: 20 }

    # curl http://localhost:8000/items?page=1
    # 响应信息如下:
    # {
    #   "detail": [
    #     {
    #       "type": "missing",
    #       "loc": [
    #         "query",
    #         "limit"
    #       ],
    #       "msg": "Field required",
    #       "input": null
    #     }
    #   ]
    # }
    return {"page": page, "limit": limit}


# 可选的 query 参数
# 首先设置类型为: int | None 或 Optional[int]
# 然后设置默认值: 以下这两种形式都可以
# 1.使用 default 参数(推荐: 语法更清晰)
# 2.直接填写 Query 的第一个参数
@app.get("/books")
async def books(
    page: int | None = Query(ge=1, default=1),
    limit: int | None = Query(10, ge=10, le=100),
):
    # curl http://localhost:8000/books?page=2&limit=15
    # 响应: { page: 2, limit: 15 }

    # curl http://localhost:8000/books?page=3
    # 响应: { page: 3, limit: 10 }

    # curl http://localhost:8000/books
    # 响应: { page: 1, limit: 10 }
return {"page": page, "limit": limit}header 参数
from fastapi import FastAPI, Header

app = FastAPI()


@app.get("/header")
async def get_header(
    # 注意: 比如在客户端设置的是 X-Request-Id
    # 它会自动转换为 snakeCase 以方便绑定到参数
    # X-Request-Id => x_request_id
    x_request_id: str | None = Header(default=None, description="请求唯一 UUID"),
):
return {"x-request-id": x_request_id}cookie 参数
from fastapi import FastAPI, Cookie

app = FastAPI()


@app.get("/cookie")
async def get_cookie(uid: str | None = Cookie(default=None, description="User ID")):
return {"cookie-uid": uid}请求体
在开发中,常见的表单编码类型有以下几种:
- JSON:
application/json - 表单参数:
application/x-www-form-urlencoded - 二进制表单参数:
multipart/form-data常用于上传文件
注意:如果使用表单(application/x-www-form-urlencoded 或 multipart/form-data) 需要安装python-multipart(uv add python-multipart)
from fastapi import FastAPI
from pydantic import BaseModel


app = FastAPI()


# 2.定义验证类型: 使用 pydantic 的 BaseModel 定义
class BookItem(BaseModel):
    name: str
    author: str


@app.post("/books")
async def create_book(book: BookItem): # 1.定义形参
    book_type = type(book).__name__
    # curl -x POST http://127.0.0.1:8000/books -H \
    # "Content-Type: application/json" -d \
    # '{"author": "天蚕土豆", "name": "斗破苍穹"}'
    # 响应信息如下:
    # {
    #   "book": {
    #     "name": "斗破苍穹",
    #     "author": "天蚕土豆"
    #   },
    #   "book_type": "BookItem"
    # }
    return {
        "book": book,
        "book_type": book_type,
}from fastapi import FastAPI, Form
from pydantic import BaseModel
app = FastAPI()
# 2.可选步骤: 定义数据类将数据整体再验证一次
# 因为有的数据需要验证多个字段, 如: 密码 和 确认密码
class BookItem(BaseModel):
name: str
author: str
@app.post("/books")
async def create_book(
# 1.定义形参: 并限制字段的值
name: str = Form(..., min_length=2, max_length=16),
author: str = Form(..., min_length=2, max_length=16),
):
# curl -X POST http://127.0.0.1:8000/books \
# -H 'Content-Type: application/x-www-form-urlencoded' \
# -d 'name=斗破苍穹'
# -d 'author=天蚕土豆'
# 响应信息如下(中文可能会被编码):
# {
# "book_item": {
# "name": "斗破苍穹",
# "author": "天蚕土豆"
# },
# "book_type": "BookItem"
# }
book_item = BookItem(name=name, author=author)
book_type = type(book_item).__name__
return {
"book_item": book_item,
"book_type": book_type,
}from fastapi import FastAPI, File, UploadFile
import os
import uuid
app = FastAPI()
# 允许上传的文件类型和大小
allow_max_file_size = 1024 * 1024 * 2 # 2M
allow_mime_types = [
"image/jpeg",
"image/jpg",
"image/png",
]
allow_mime_types_str = ",".join(allow_mime_types)
# 上传小文件
# TODO: 如果是上传多个:
@app.post("/upload_book_cover")
async def upload_book_cover(
file: UploadFile = File(
...,
# 会在 API 文档中标注允许上传的文件类型和大小
media_type=allow_mime_types_str,
max_size=allow_max_file_size,
),
):
# 查看文件对象有哪些属性
print("======\n", file)
# 手动限制类型和大小
if file.content_type not in allow_mime_types:
return {"error": "不允许上传该类型的文件"}
if file.size and file.size > allow_max_file_size:
return {"error": "文件大小超过限制"}
# 上传
upload_dir = "./uploads"
os.makedirs(upload_dir, exist_ok=True)
file_name = f"{uuid.uuid4()}_{file.filename}"
file_path = os.path.join(upload_dir, file_name)
with open(file_path, "wb") as f:
f.write(file.file.read())
# 注意这个请求的参数 avatar.jpg 必须是存在于当前目录下的
# curl -X 'POST' http://127.0.0.1:8000/upload_book_cover \
# -F 'file=@./avatar.jpg'
# 响应如下:
# {
# "file_name": "d1ed2629-f791-4ffa-80e4-d6ca035f92ea_avatar.jpg",
# "file_path": "./uploads/d1ed2629-f791-4ffa-80e4-d6ca035f92ea_avatar.jpg",
# "file_size": 71174
# }
# curl -X 'POST' http://127.0.0.1:8000/upload_book_cover \
# -F 'file=@./main.py'
# 响应如下:
# {"error":"不允许上传该类型的文件"}%
return {
"file_name": file_name,
"file_path": file_path,
"file_size": file.size,
}响应
默认情况下, fastapi 会将 python dict/list/pydantic-model 转换为 json 然后响应
json
from fastapi import FastAPI
from pydantic import BaseModel


app = FastAPI()


# dict 类型
# response_model 标注响应类型会在API文档中展示
@app.get("/dict", response_model=dict[str, str])
async def json1():
    return {"message": "Hello World"}


# list 类型
@app.get("/list", response_model=list[dict[str, str]])
async def json2():
    return [
        {"message": "Hello"},
        {"message": "World"},
    ]


# pydantic 模型对象
class BookItem(BaseModel):
    name: str
    author: str


@app.get("/pydantic_model", response_model=BookItem)
async def json3():
return BookItem(name="斗破苍穹", author="天蚕土豆")HTML/纯文本
from fastapi import FastAPI
from fastapi.responses import PlainTextResponse, HTMLResponse


app = FastAPI()


# 响应纯文本
@app.get("/text", response_class=PlainTextResponse)
async def text():
    return "Hello World"


# 响应 html
@app.get("/html", response_class=HTMLResponse)
async def html():
    return "<h1>Hello World</h1>"


# 都是字符串, 有什么不同呢?
# 响应头的 "Content-Type" 字段可以指定响应的内容类型
# 使用不同的响应类, 会设置不同的响应头
# text: content-type: text/plain; charset=utf-8
# html: content-type: text/html; charset=utf-8附件下载
from fastapi import FastAPI
from fastapi.responses import FileResponse


app = FastAPI()


# 响应一个附件下载
@app.get("/download")
async def text():
    # 直接给个路径即可, 会自动读取
    # 响应头如下
    # HTTP/1.1 200 OK
    # date: Mon, 22 Dec 2025 19:25:23 GMT
    # server: uvicorn
    # content-type: text/plain; charset=utf-8
    # accept-ranges: bytes
    # content-disposition: attachment; filename="pyproject.toml"  # 注意这一行
    # content-length: 245
    # last-modified: Mon, 22 Dec 2025 17:35:48 GMT
    # etag: "cd06553d1986874b68f6339417d16114"

    file_path = "pyproject.toml"
    file_name = file_path
return FileResponse(file_path, media_type="text/plain", filename=file_name)二进制流
import asyncio
from fastapi import FastAPI
from fastapi.responses import Response, StreamingResponse


app = FastAPI()


# 1.如果是响应一个小的二进制流, 可以手动一次性全部响应
@app.get("/small_stream")
async def small_steam():
    # 响应头如下:
    # HTTP/1.1 200 OK
    # date: Mon, 22 Dec 2025 19:39:30 GMT
    # server: uvicorn
    # content-length: 245
    # content-type: text/octet-stream; charset=utf-8
    with open("./pyproject.toml", "rb") as f:
        file_bytes = f.read()
    return Response(file_bytes, media_type="text/octet-stream")


# 模拟分块读取大文件
async def large_file_reader():
    with open("./pyproject.toml", "rb") as f:
        while chunk := f.read(4096):  # 4kb
            yield chunk

    # 由于 pyproject.toml 这个文件很小一次就
    # 直接读完了所以需要手动模拟下延迟
    await asyncio.sleep(1)
    yield b"Hello,"
    yield b"World!"


# 2.如果是响应一个大的二进制流
@app.get("/large_stream")
async def big_steam():
    # 一秒之后才会获得完整响应
    # HTTP/1.1 200 OK
    # date: Mon, 22 Dec 2025 19:41:04 GMT
    # server: uvicorn
    # content-type: text/octet-stream; charset=utf-8
    # transfer-encoding: chunked
return StreamingResponse(large_file_reader(), media_type="text/octet-stream")重定向
from fastapi import FastAPI
from fastapi.responses import RedirectResponse


app = FastAPI()


@app.get("/redirect")
async def redirect():
    # status_code 默认就是 302 可以设置为 301
    url = "https://www.baidu.com"
return RedirectResponse(url=url, status_code=302)异常处理
使用默认的错误处理
from fastapi import FastAPI, HTTPException

app = FastAPI()


@app.get("/")
async def main():
    # curl http://127.0.0.1:8000/
    # 响应信息如下:
    # HTTP/1.1 404 Not Found
    # date: Wed, 24 Dec 2025 11:26:12 GMT
    # server: uvicorn
    # x-error: Custom header
    # content-length: 22
    # content-type: application/json
    #
    # {
    #   "detail": "Not found"
    # }

    # 手动抛出异常
    raise HTTPException(
        status_code=404,  #### http 状态码
        detail="Not found",  # 响应 body 数据, json 格式
        headers={  ########### 自定义响应头
            "X-Error": "Custom header",
        },
)覆盖默认的错误处理
文档: https://fastapi.org.cn/tutorial/handling-errors/#override-the-default-exception-handlers
from fastapi import FastAPI, HTTPException
from fastapi.responses import PlainTextResponse
from starlette.exceptions import HTTPException as StarletteHTTPException

app = FastAPI()


# 自定异常处理: 直接响应一个字符串, 默认是响应一个 json
@app.exception_handler(StarletteHTTPException)
async def http_exception_handler(request, exc):
    return PlainTextResponse(str(exc.detail), status_code=exc.status_code)


@app.get("/")
async def index():
    # curl http://127.0.0.1:8000/
    # 响应信息如下:
    # HTTP/1.1 500 Internal Server Error
    # date: Wed, 24 Dec 2025 11:51:14 GMT
    # server: uvicorn
    # content-length: 21
    # content-type: text/plain; charset=utf-8
    #
    # Internal Server Error
raise HTTPException(status_code=500, detail="Internal Server Error")中间件
普通中间件
from fastapi import FastAPI, Request, Response
from loguru import logger
import time


app = FastAPI()


# 记录日志信息中间件
@app.middleware("http")
async def print_log_middleware(request: Request, next):
    start_time = time.time()

    # 输出请求的方式和URL
    logger.debug(f"请求信息: {request.method} {request.url}")

    # 获取响应对象
    response: Response = await next(request)

    # 设置 请求用时 响应头
    # 注意: 直接访问 response.body 在中间件中通常是不可行的,
    # 因为它可能是一个流(StreamingResponse)如果你需要访问或
    # 修改 body, 需要更复杂的处理,例如重新创建响应对象
    # 但一般不推荐在中间件中修改 body, 但修改 headers 是可以的
    process_time = time.time() - start_time
    response.headers["X-Process-Time"] = str(process_time)

    # 输出响应信息
    logger.debug(f"响应状态码: {response.status_code}")
    logger.debug(f"响应头对象: {dict(response.headers)}")

    return response


@app.get("/")
async def index():
    return {
        "message": "Hello World",
}高级中间件(了解)
由于 fastapi 是基于 starlette 来实现的 所谓的高级中间件其实添加 Starlette 原生中间件, 比如添加 CSRF 验证的中间件 一般情况下, 不需要自己去写这些高级中间件, 可以去 starlette 文章中找需要的中间件
CORS 跨域中间件
这是一个内置高级中间件, 直接导入使用即可
from fastapi import FastAPI
from fastapi.middleware.cors import CORSMiddleware

app = FastAPI()

app.add_middleware(
    CORSMiddleware,
    allow_origins=["http://localhost:8080"],
    allow_methods=["*"],
    allow_headers=["*"],
    allow_credentials=True,
)


@app.get("/")
async def main():
return {"message": "Hello World"}依赖注入
from fastapi import FastAPI, Depends, Query
from typing import Annotated

app = FastAPI()


# 处理分页参数的公共方法
# 处理 page 和 limit 两个 query 参数, 并且返回一个 dict
def parse_pagination_query(
    page: int | None = Query(ge=1, default=1),
    limit: int | None = Query(ge=10, le=50, default=10),
):
    return {
        "page": page,
        "limit": limit,
    }


# 使用 Depends 注入
@app.get("/users")
async def users(
    pagination: Annotated[dict[str, int], Depends(parse_pagination_query)],
):
    # curl http://127.0.0.1:8000/users
    # 响应信息如下:
    # HTTP/1.1 200 OK
    # date: Wed, 24 Dec 2025 12:21:00 GMT
    # server: uvicorn
    # content-length: 21
    # content-type: application/json
    #
    # {
    #   "page": 1,
    #   "limit": 10
    # }
    return pagination


# 使用 Depends 注入
@app.get("/articles")
async def articles(
    pagination: Annotated[dict[str, int], Depends(parse_pagination_query)],
):
    # curl http://127.0.0.1:8000/articles
    # 响应信息如下:
    # HTTP/1.1 200 OK
    # date: Wed, 24 Dec 2025 12:21:00 GMT
    # server: uvicorn
    # content-length: 21
    # content-type: application/json
    #
    # {
    #   "page": 1,
    #   "limit": 10
    # }
    #
return pagination路由分组 - APIRoute
类似 flask 的 Blueprint 蓝图的功能
from fastapi import APIRoute

# prefix:路由分组的前缀
# tags: 设置 Swagger 文档的接口分组
api_v1 = APIRoute(prefix="/api/v1", tags="v1")
api_v2 = APIRoute(prefix="/api/v2", tags="v2")

# 需要这样请求: curl -X POST http://127.0.0.1/api/v1/login
@api_v1.post("/login")
async def login():
  return { "message": "login_v1" }


# 需要这样请求: curl -X POST http://127.0.0.1/api/v2/login
@api_v2.post("/login")
async def login_v2():
return { "message": "login_v1" }SQLModel & alembic 实现迁移
fastapi 官方文档上推荐的是 SQLModel, 那么就使用 SQLModel 吧, 其实使用 SQLAlchemy 也是一样的, 因为 SQLModel 就是基于 SQLAlchemy 和 pyantic 封装的
在之前学习 SQLAlchemy 的时候, 已经学会了如何链接数据库/建模/迁移, 为什么还要再学习一遍?
的确, SQLModel 是基于 SQLAlchemy 和 pyantic 封装的, 但是 SQLModel 有一些地方还是与 SQLAlchemy 不同, 比如: 建模和迁移 所以这个示例项目的重点是: 如何使用 SQLModel 建模(与SQLAlchemy建模不太一样) 并迁移到数据库
至于增删改查操作数据, 区别非常小, 只要学习过 SQLAlchemy 那么 SQLModel 根本不用学, 基本是一模一样的
1.创建项目
# 初始化项目
uv init sqlmodel-demo
cd sqlmodel-demo

# 安装依赖 aiosqlite 是 sqlite 的异步链接驱动
uv add sqlmodel alembic

# 初始化 alembic
uv run alembic init -t async ./migrations

# 创建 src/models 目录
mkdir -p ./src/models目录结构如下:
.
├── README.md
├── alembic.ini
├── main.py
├── migrations           # 迁移文件
│   ├── README
│   ├── env.py
│   ├── script.py.mako
│   └── versions
├── pyproject.toml
├── src
│   └── models
│       ├── __init__.py  # 连接数据库 & 导出
│       └── user.py      # 模型文件
└── uv.lock

5 directories, 10 files2.修改代码
# pyright: reportIncompatibleVariableOverride=false
# pyright: reportUnusedImport=false
# 这两行注释是为了让 pyright 忽略 __tablename__ 的类型错误
from sqlmodel import Field, SQLModel
from datetime import datetime
import string
import random


def get_random_str(len: int = 10):
    """
    获取随机字符串: 包含大小写字母和数字
    """
    characters = string.ascii_letters + string.digits
    random_str = "".join(random.choices(characters, k=len))
    return random_str


class UserModel(SQLModel, table=True):
    __tablename__: str = "users"

    # primary_key 为 true 会自动设置 auto_increment
    id: int = Field(primary_key=True)
    # default_factory: 默认值生成函数, nullable=False:不许为空, max_length=32: 最长为 32 个字符
    username: str = Field(default_factory=get_random_str, nullable=False, max_length=32)
    # ...:表示必填
    email: str = Field(..., nullable=False, max_length=128)
    password: str = Field(..., nullable=False, max_length=128)
    avatar_url: str | None = Field(default=None, max_length=256)
    created_at: str = Field(default=datetime.now(), nullable=False)
updated_at: datetime | None = Field(default=None, nullable=True)from sqlmodel import create_engine, Session, SQLModel
from src.models.user import UserModel
# 注意驱动需要使用 aiosqlite 异步驱动,
# 因为创建的迁移模板用的是 async 不是 generic
# 所以不能使用默认的 pysqlite, 因为它是同步的
DB_URL = "sqlite+aiosqlite:///database.db"
engine = create_engine(DB_URL, echo=True)
def create_session():
return Session(engine)
__all__ = ["SQLModel", "UserModel", "engine", "create_session"]# 将这几句代码加入到导入语句的最后
import sys
from pathlib import Path
sys.path.append(str(Path(__file__).parent))
from src.models import DB_URL, SQLModel
# 修改 target_metadata, 动态覆盖 alembic.ini 的选项, 使之能够正确链接数据库
target_metadata = SQLModel.metadata
config.set_main_option("sqlalchemy.url", DB_URL)"""${message}
Revision ID: ${up_revision}
Revises: ${down_revision | comma,n}
Create Date: ${create_date}
"""
from typing import Sequence, Union
from alembic import op
import sqlalchemy as sa
import sqlmodel # 增加这一行否则报错, 其他不用改
${imports if imports else ""}
# revision identifiers, used by Alembic.
revision: str = ${repr(up_revision)}
down_revision: Union[str, Sequence[str], None] = ${repr(down_revision)}
branch_labels: Union[str, Sequence[str], None] = ${repr(branch_labels)}
depends_on: Union[str, Sequence[str], None] = ${repr(depends_on)}
def upgrade() -> None:
"""Upgrade schema."""
${upgrades if upgrades else "pass"}
def downgrade() -> None:
"""Downgrade schema."""
${downgrades if downgrades else "pass"}3.修改模型
增加 telephone 字段
# pyright: reportIncompatibleVariableOverride=false
# pyright: reportUnusedImport=false
from sqlmodel import Field, SQLModel
from datetime import datetime
import string
import random


def get_random_str(len: int = 10):
    """
    获取随机字符串: 包含大小写字母和数字
    """
    characters = string.ascii_letters + string.digits
    random_str = "".join(random.choices(characters, k=len))
    return random_str


class UserModel(SQLModel, table=True):
    __tablename__: str = "users"
    id: int = Field(primary_key=True)
    username: str = Field(default_factory=get_random_str, nullable=False, max_length=32)
    email: str = Field(..., nullable=False, max_length=128)
    telephone: str | None = Field(default=None, nullable=True, max_length=16)
    password: str = Field(..., nullable=False, max_length=128)
    avatar_url: str | None = Field(default=None, max_length=256)
    created_at: str = Field(default=datetime.now(), nullable=False)
updated_at: datetime | None = Field(default=None, nullable=True)4.再次迁移
uv run alembic revision --autogenerate -m "add telephone column for users"
uv run alembic upgrade head迁移成功后记得用GUI数据库客户端查看验证, 因为 SQLModel 官方文档居然没有关于迁移的文档... 就离谱, 还得自己找Github Issue